How to Download Private Internet Access – Official VPN Installation Guide
Private Internet Access (PIA) is one of the most trusted VPN services, offering strong encryption, a strict no‑logs policy, and high‑speed connections. Whether you’re a new user or reinstalling, this guide will walk you through the entire process of downloading and installing PIA on Windows, macOS, Linux, Android, iOS, and even browser extensions. By the end, you’ll be ready to secure your online activities with just a few clicks.
Why Choose Private Internet Access?
Before we dive into the installation, it’s worth understanding what makes PIA a top choice for millions of users:
- Proven No‑Logs Policy: PIA has been independently audited to confirm they don’t collect or store any logs of your online activity.
- Fast Speeds: With the WireGuard® protocol, you get some of the fastest VPN speeds available, perfect for streaming, gaming, and browsing.
- Unlimited Simultaneous Connections: One subscription works on as many devices as you want – no restrictions.
- Advanced Security Features: Includes a kill switch, DNS leak protection, split tunneling, and a built‑in ad/malware blocker (MACE).
- 30‑Day Money‑Back Guarantee: If you’re not satisfied, you can get a full refund within the first month.
Now, let’s get you set up.
Supported Platforms and Where to Download
Windows
Windows 7, 8, 10, 11 (32/64‑bit)
Available from the official PIA website
macOS
macOS 10.12 and later (Intel & Apple Silicon)
Available from the official PIA website
Linux
Debian/Ubuntu, Fedora, Arch, and more
Available as .deb, .rpm, or via terminal script
Android
Android 6.0 and above
Google Play Store
iOS / iPadOS
iOS 13.0 and above
Apple App Store
Browser Extensions
Chrome, Firefox, Edge, Opera
Available in respective browser stores
For desktop platforms (Windows, macOS, Linux), it’s safest to download directly from the official PIA website to ensure you get the latest version without any malware. For mobile devices, always use the official app stores.
System Requirements
Before you download, make sure your device meets these minimum requirements:
- Windows: Windows 7 or later, 1 GB RAM, 100 MB free disk space.
- macOS: macOS 10.12 (Sierra) or later, 100 MB free disk space.
- Linux: Kernel 2.6.32 or higher, 512 MB RAM, and support for OpenVPN/WireGuard.
- Android: Android 6.0 (Marshmallow) or higher.
- iOS: iOS 13.0 or higher.
PIA is lightweight and runs smoothly even on older hardware, so you shouldn’t have any performance issues.
Step‑by‑Step Installation
Windows
macOS
.dmg file..dmg file. A window will appear with the PIA app icon and an Applications folder shortcut.Linux (Ubuntu/Debian Example)
.deb package for Debian/Ubuntu systems. Alternatively, you can use the terminal installer.cd ~/Downloads.sudo dpkg -i pia‑*.deb. If you get dependency errors, run sudo apt install -f to fix them.pia in the terminal.curl -L https://install.privateinternetaccess.com/install.sh | bash
Android
iOS / iPadOS
First‑Run Setup and Logging In
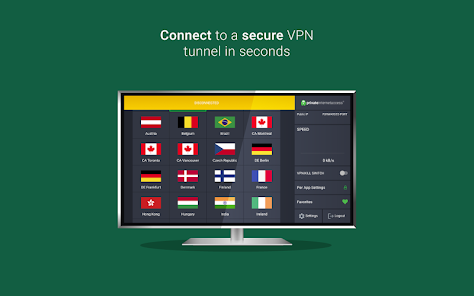
Once the app is installed and launched, you’ll be presented with a login screen. If you already have a PIA subscription, enter the email address and password you used when purchasing. If you’re new, you can create an account directly from the app or on the website. After logging in, you’ll see the main interface:
- Connect Button: A large power button – click it to connect to the recommended server. By default, it picks the fastest location.
- Server List: You can manually select a country or city from the list. Hover over any location to see its ping time.
- Settings: The gear icon opens advanced options, where you can choose protocols (WireGuard is recommended for speed), enable the kill switch, customize DNS, and turn on MACE (ad blocker).
Troubleshooting Common Issues
If you run into any problems during download or installation, here are some quick fixes:
- Download fails or is slow: Try a different browser or use a download manager. Ensure your internet connection is stable. Clear your browser cache and try again.
- Antivirus blocking installation: Some security software may flag VPN installers. Temporarily disable your antivirus, install PIA, then re‑enable it and add an exception.
- macOS “unidentified developer” warning: Go to System Settings > Privacy & Security, scroll to the “Security” section, and click “Open Anyway” next to the PIA warning.
- Linux dependency errors: After installing the .deb package, run
sudo apt --fix-broken installto resolve any missing dependencies. - App fails to launch after install: Restart your device. If the problem persists, uninstall, reboot, and reinstall the app.
Conclusion
Downloading and installing Private Internet Access is a straightforward process, regardless of your device. The official apps are designed to be user‑friendly, and the installation steps are clearly laid out. Once installed, you’ll have a powerful tool to protect your privacy, bypass censorship, and enjoy a more secure internet experience.
If you ever need additional help, the PIA knowledge base contains detailed articles, and live chat support is available 24/7. Now that you’re set up, enjoy your private, unrestricted browsing.